|
|
< Day Day Up > |
|
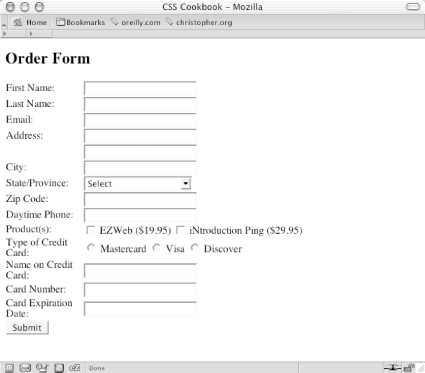
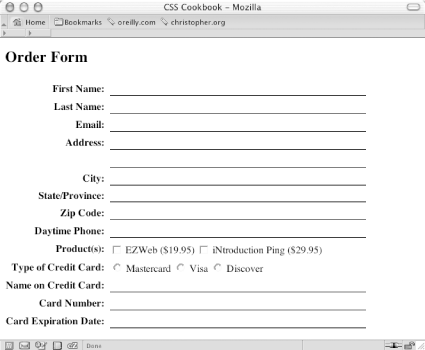
Recipe 8.2 Making a Web Form Print-ReadyProblemYou need to have a form that users can fill out online, or that they can print and then fill out offline, as shown in Figure 8-1. Figure 8-1. An online form SolutionFirst, create a print media style sheet and a class selector that transforms the form elements so that they display black text and feature a one-pixel border on the bottom. For example, the following HTML code for an input text element: <label for="fname">First Name</label> <input class="fillout" name="fname" type="text" id="fname" /> requires the following CSS rule: <style type="text/css" media="print ">
.fillout {
color: black;
border-width: 0;
border: 1px solid #000;
width: 300pt;
}
</style>For drop-down menus, hide the select element altogether and add some additional markup to help produce the bottom border: <label for="bitem">Breakfast Item</label> <select name="bitem" size="1"> <option selected="selected">Select</option> <option>Milk</option> <option>Eggs</option> <option>Orange Juice</option> <option>Newspaper</option> </select><span class="postselect"> </span> Then, in the CSS rules, convert the inline span element to a block element. This enables you to set the width of the span element and places the border at the bottom to equal that of the input elements in the preceding CSS rule: <style type="text/css" media="print">
select {

 display: none;

}
.postselect {

 display: block;

 width: 300pt;

 height: 1em;

 border: none;

 border-bottom: 1px solid #000;

}
</style>For elements such as a Submit button, which can't be used on the printed page, set the display property to none. You can see the finished product in Figure 8-2. Figure 8-2. The same form primed for printing DiscussionLines on an order form tell users they can fill out the form. By using the border property, you can easily create these lines in a browser, making web forms useful both online and offline. For select elements, the workaround is somewhat of a hack that involves interfering with the ideal semantic markup; it still works and is valid HTML. Place a span element after the select element: <select name="bitem" size="1"> <option selected="selected">Select</option> <option>Milk</option> <option>Eggs</option> <option>Orange Juice</option> <option>Newspaper</option> </select> <span class="postselect"> </span> Then set the select element to disappear: select {
display: none;
}Next, set the span element to display as a block to enable the width and height properties. With those width and height properties set, the bottom border can be placed to match the rest of the form elements: .postselect {
display: block;
width: 300pt;
height: 1em;
border: none;
border-bottom: 1px solid #000;
}As browsers implement attribute selectors from the CSS specification, styling forms for print becomes easier. Currently, the only browsers that support attribute selectors are Netscape Navigator 6+ and Opera 5+. When you use attribute selectors, it's easier to distinguish which form elements should be stylized than it is when you insert class attributes and their respective values in the markup. In the following code, the first CSS rule applies only to input elements for text, while the second rule hides the Submit button and the Select drop box: input[type="text"] {
color: black;
border-width: 0;
border: 1px solid #000;
}
input[type="submit"], select {
display: none;
}Once your form is ready to be printed, be sure to include instructions on how users should handle the printed form. For example, if you want users to mail the form, add a mailing address to the page on which the form is printed. See AlsoAttribute selector documentation in the W3C specification at http://www.w3.org/TR/CSS21/selector.html#attribute-selectors; HTML 4.01 specification about the label tag at http://www.w3.org/TR/html401/interact/forms.html#edef-LABEL. |
|
|
< Day Day Up > |
|