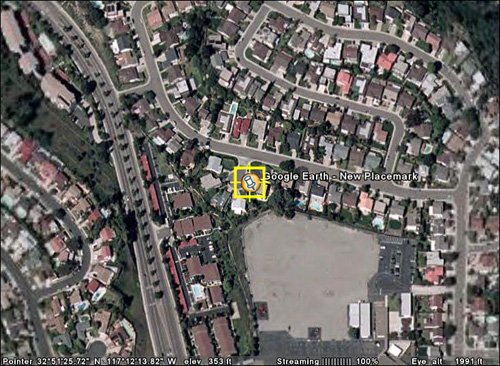
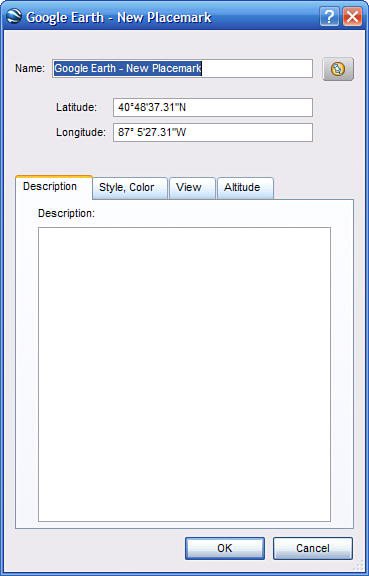
Previous Page
Next Page

Creating Custom Placemarks

About that My Places folder. This is a folder where you can store any item for future use. You can store pre-existing POIs, as we just discussed, or store custom placemarks that you create yourself.

To mark any place on any Google Earth map as a placemark, follow these steps:

1.
Zoom into the location you want to placemark.

2.
Click the Add a Placemark button on the Toolbar (or select Add, Placemark).

3.
A new, blank placemark is now placed on the map, as shown in Figure 20.28. If the placemark is not in the correct location, use your mouse to drag it around the map as necessary.

Figure 20.28. Adding a new placemark to a map.


4.
Also appearing at this time is a New Placemark dialog box, like the one shown in Figure 20.29. Enter a new name for the placemark, along with any descriptive text you'd like, and then click the OK button.


Figure 20.29. Entering information about the new placemark.


As you can see in Figure 20.30, the placemark is now set on the map, with the name you provided. The placemark is also stored in the My Places folder (or other folder you selected).

Figure 20.30. The new placemark, properly named and placed.
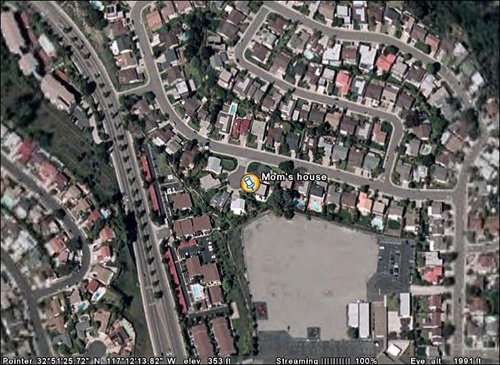


Previous Page
Next Page