The one new Google program exclusive to Google Pack is the Google Pack Screensaver. This program displays selected digital photos as your Windows screensaver.
By default, the Google Pack Screensaver displays pictures in your My Pictures folder in a photo collage, like the one shown in Figure 35.2. You can also choose to display pictures sequentially, with either a wipe or fade effect; you can also select other folders or subfolders to include in the display.
1. | Right-click on an open area of the Windows desktop and select Properties from the pop-up menu.
|
2. | When the Display Properties dialog box appears, select the Screen Saver tab.
|
| |
3. | Pull down the Screen Saver list and make sure Google Pack Screensaver is selected.
|
4. | Click the Settings button.
|
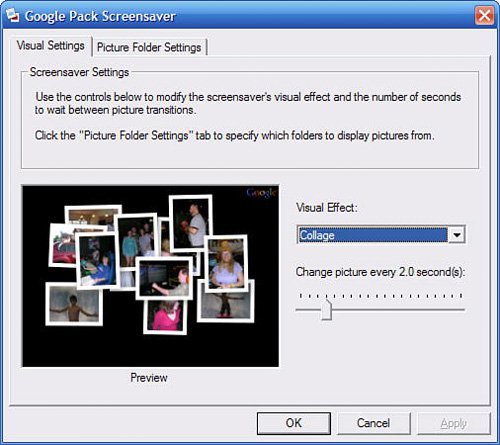
5. | When the Google Pack Screensaver dialog box appears, select the Visual Settings tab, shown in Figure 35.3. Pull down the Visual Effect list to select a new effect; adjust the slider to set how long each picture is displayed.

|
| |
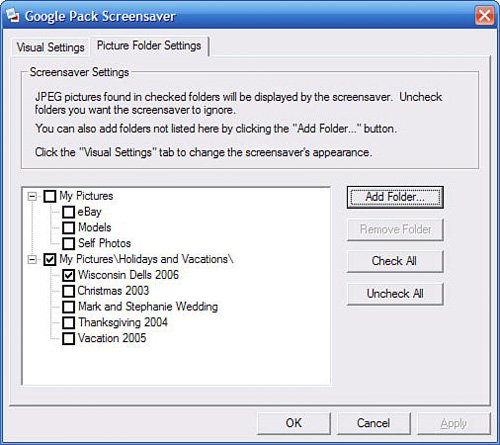
6. | To select which pictures are displayed, select the Picture Folder Settings tab, shown in Figure 35.4. Check which folders and subfolders you want to display, or click the Add button to add more folders or subfolders.

|
7. | When you're done adjusting the settings, click the OK button.
|
