|
|
< Day Day Up > |
|
Hack 94 Use irssi and Its Proxy
irssi is a highly configurable and scriptable IRC client for Unix. Its proxy feature can open the doors to more advanced use. This hack shows you how to configure the irssi IRC client and set up its proxy features so you can resume your IRC session while on the move. irssi can be compiled and installed from source code or it can be installed from a package. There are source and package downloads available from the irssi web site at http://www.irssi.org. If you do compile from source, make sure you add the --with-proxy option to configure, as the final part of this hack needs it. On Debian systems, the package is named irssi-text. This is because there is an older version of irssi, which has a graphical frontend, but it hasn't been maintained for a few years. When you start irssi by running the command irssi, it will print a message telling you to read some of the documentation. You'll find the startup-HOWTO on the irssi web site, although it is also provided in the docs directory with the irssi source. You can skip reading it if you like, as this hack will summarize the important points and walk you through the process of using the proxy. irssi supports multiple servers and deals with connecting to them automatically, but to get the best support, you really need to define the servers. To do this, you must use the ircnet and the server commands. As an example, we'll set up the IRC network freenode with one server, irc.freenode.net: /ircnet add freenode /server add -auto -ircnet freenode irc.freenode.net ircnet is the friendly name by which the connection will be referred to in irssi, but the server could be one of many. It's possible to add several servers, so the alternative ones can be tried if there is a problem connecting to the first. The -auto parameter to /server means to automatically connect to this server, and the -ircnet associates it with the correct IRC network. If you want to add extra information such as a password for connecting to a server, /help server will tell you the syntax. The Page Up key should allow you to scroll up when you are viewing this documentation. The ircnet command can also accept some options, for example: /ircnet add -autosendcmd "/^msg NickServ identify password;wait -freenode
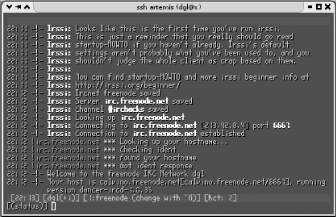
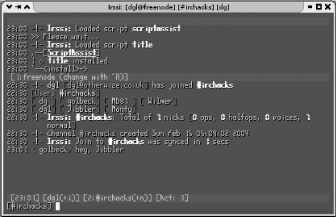
2000" freenodeThis command will automatically message NickServ with your password and then wait two seconds before trying to join a channel. The ^ character before msg means to hide the sending of the message so your password won't be seen by anyone else who happens to be looking at your screen. Next you need to decide which channels you want to join. This is very much the same as with servers, the only real difference being that the -ircnet parameter has changed: /channel add -auto #irchacks freenode This means irssi will automatically join #irchacks when it connects to freenode. Before you connect, you might like to change your nickname and real name that are sent to IRC—by default, these will be your login details. They can be changed via the /set command: /set nick Nickname /set real_name Real Name It's worth noting at this point that the /set command has a useful feature: if you write only part of a setting name, it will show all possible settings that match. The documentation of settings in irssi isn't brilliant, so this method is a good way to find undocumented settings. For example, try /set nick and you will see lots of settings related to nicknames. 14.10.1 Connecting to a ServerThere are two ways you can connect with irssi. The first is to quit from irssi (/quit) and start it again. Because the server is set to automatically connect, it will do so upon startup. The second way is to type /connect freenode. Figure 14-9 shows irssi connected to the freenode IRC network. Figure 14-9. Using irssi to connect to a server for the first time Once you have connected and automatically joined a channel, irssi will have created a new "window" for the channel. Along the bottom on the status bar you will see [Act: 2]. This means there is activity in window number 2. You can change between windows using various keyboard combinations: Alt-number will change to that window number, Alt-A will change to a window with activity, and Alt-left arrow and Alt-right arrow will go to the window to the left and right. If the Alt combination doesn't work, you will need to change the keyboard mapping of your terminal. startup-HOWTO has details about this. By now, you may have started chatting with the people in the channel you joined. If you want to ask someone a question or you want to write something directed at someone, you can type part of her nickname and press the Tab key. irssi should complete the nickname and add a colon on the end. Tab completion doesn't end there though; / commands will also tab-complete, as will their parameters and even channel and server names. If you have joined several channels, you may want to keep them in a particular order. You can move the current window to the second location with the /window command: /window move 2 Once you have the windows in an order you like, you should run the command: /layout save This will save them and remember the order next time you start irssi. Another useful feature is split windows. This means you can display more than one channel at the same time within the same terminal session. For example, in a channel window, you can type: /window show 1This will show the Status window along the top. You can change to it with Alt-1 as usual or with Alt-Up. Connecting to multiple servers with irssi is very easy. You simply need to define another ircnet and another set of servers and channel, as demonstrated by the freenode example earlier. irssi will then automatically connect to all the servers on startup. Each server connection is given a tag. This tag is usually the same as the ircnet, but if you connect to a server manually or have multiple connections to one ircnet, it will be different. If you want to execute a command on a specific server connection, you can add the -tag parameter to most commands. For example, to join the channel #foo on the server with the tag private, you would type: /join -private #fooYou can also use Ctrl-X to change between servers in a window that does not have any items, such as the Status window. The /bind command allows you to change what the keys do. You can assign them to any command or a few special commands (see /help bind). By default, the keys Alt-q to Alt-o (along the top line of a QWERTY keyboard) jump to the windows 11 to 19, but if you have a different keyboard layout, you may want to change this. irssi supports embedded Perl scripting. Perl scripts can control nearly all the aspects of irssi, so there are lots of possibilities here if you fancy getting into it. The irssi script archive at http://irssi.org/scripts has a lot of scripts available for download. One script will even automatically install scripts for you from the script archive. To use this, simply type: /script load scriptassistIf there is a problem loading the script, you may not have the LWP Perl modules installed. They should be available as a package for most distributions; the name will be something like libwww-perl or LWP. Once scriptassist is loaded, you will see several new script commands. Typing /script help will give you a list of all of these. As an example, if you want to install the title script that sets the window title in a graphical terminal, type: /script install titleTo run it automatically whenever you start irssi, type: /script autorun titleIt's also a good idea to do this for scriptassist to ensure that it is always loaded. The title script also adds some settings. You can see these by typing: /set title Figure 14-10 shows irssi running in a graphical terminal with the title script. Note that the window title displays the nickname, network, and current channel. Figure 14-10. irssi showing scriptassist installing the title script The status bar at the bottom of the window contains a lot of information, including your current nickname, channel, or server, as well as the modes set on them. As mentioned previously, there is an item that contains the activity in all the windows you have joined. The window number will change color to white if there are messages in the channel, or it will turn red if someone has mentioned your nickname. You can add extra highlight words with the /hilight command. It is also possible to script status bar items. For example, irssi comes with a script called usercount that will display the number of users in a channel. To load it, run /script load usercount. To get the status bar item, you need to use the /statusbar command. The syntax is a little confusing, and you need to remember that the first parameter is always the name of the status bar. You can add the user count to the right of the status bar on the bottom (the window status bar) with the following command: /statusbar window add -alignment right usercount 14.10.2 Using the irssi ProxyIf you're frequently on the move and end up connecting to IRC from different places, it's nice to be able to access it from the same client every time. This not only ensures that you remain permanently connected to the IRC network, but you will be able to keep all your log files in one place. irssi allows you achieve this feat by providing a proxy, which lets you use another IRC client to connect to your irssi instance. For those familiar with bouncers (if not, see [Hack #93] ), this is very similar. The only real difference here is this all happens inside an IRC client, so if you use irssi inside screen [Hack #92], you don't always need an IRC client to connect (although you can use one if you want to). To load the proxy module, type: /load proxy If you want to load the proxy every time you start irssi, edit the file ~/.irssi/startup, creating it if it doesn't already exist. You can then add the line /load proxy to the file, and this command will be executed automatically every time you start up irssi. The proxy module will tell you to set a password when you load it. To set your password to "password", you must type: /set irssiproxy_password passwordYou will now need to set a port number for each IRC network. These are the port numbers that you will connect to from another IRC client. Valid port numbers range from 1024-65535. It's a good idea to avoid the normal IRC port (6667), as other people may accidentally connect to you and think you're running an IRC server. For example, you may have two IRC networks you want to proxy: freenode on port 4050 and blitzed on port 4051. Assuming both of these have been set up correctly with the ircnet command, you can type: /set irssiproxy_ports freenode=4050 blitzed=4051This will enable access to these networks via the proxy. Now you should be able to use another IRC client to connect to port 4050 of the host where irssi is running. If you use the correct password, you will appear to join the channels the irssi client is in. This connection can now be treated as if you were actually connected to the server, with one minor difference—you will see yourself speaking in the other IRC client when you speak in one. —David Leadbeater |
|
|
< Day Day Up > |
|