| |
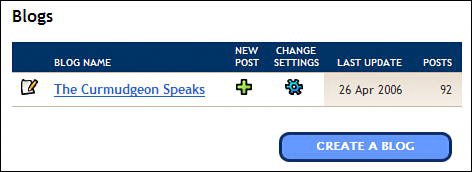
1. | From the Blogger Dashboard, click the New Post icon for this particular blog (as shown in Figure 23.7).

|
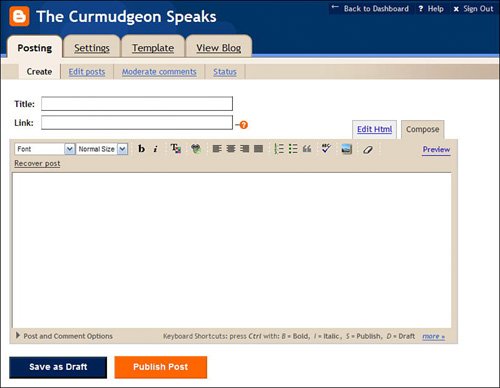
2. | When the Posting page appears, as shown in Figure 23.8, enter a title for this post.

|
3. | If this post refers to another page on the Web, enter the URL for that page into the Link box.
|
4. | Enter the text for your post into the large text box. If you like, you can format the text (bold, italic, colors, etc.) using the formatting toolbar above this text box.
|
5. | If you want to apply more sophisticated formatting (and you know how to code in HTML), click the Edit HTML tab and enter your own HTML codes.
|
| |
6. | To check the spelling in your post, click the Check Spelling button and follow the onscreen instructions.
|
7. | To view a preview of your post, click the Preview link.
|
8. | To save a draft of your post for editing and posting at a future time, click the Save As Draft button.
|
9. | When you're done writing and formatting, click the Publish Post button.
|
