Distributing Your Own Videos via the Google Video Upload ProgramEver dream of becoming a big-time movie director? Well, all big-time movie directors have to start somewhereand Google Video is as good a place as any. Google offers the Google Video Upload program to all aspiring filmmakers out there. The program lets you upload your own videos and home movies to the Google Video site, where they can be viewed and downloaded by anyone on the Web. Tip If you're a professional video producer with more than 1,000 hours of video you want to upload, you can take advantage of Google Video's Premium Program. Learn more at services.google.com/inquiry/video/. Understanding Upload File GuidelinesTo upload a video file to Google Video, it must meet the following format and content requirements:
Uploading VideosTo upload videos to Google Video, all you have to do is follow these steps:
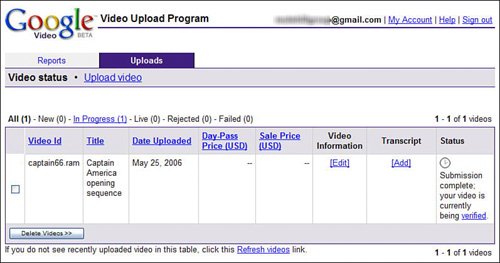
Charging for Your VideoIf you want to charge users for downloading your video, you can do this. You can assign either purchase or Day Pass status to your video, at whatever price you want. To do this, go to the Google Video home page and click the Uploaded Videos link. All the videos you've uploaded are listed here on the Video Status page, as shown in Figure 25.19. Figure 25.19. Viewing the status of all the videos you've uploaded.
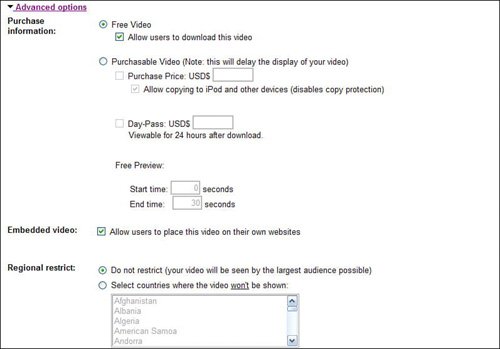
Click the Edit link in the Video Information column for the video you want to add. This displays the Add/Edit Video Information page. From here, click the Advanced Options link. This expands the page to include the section shown in Figure 25.20. From here you can select the following payment options: Figure 25.20. Specifying purchase options for your video.
Make your changes, and then click the Save Video Information button. Purchases will be applied to your Google Payments account. Note Learn more about Google Payments in Chapter 17, "Buying and SellingOnline and Locallywith Google Base." |