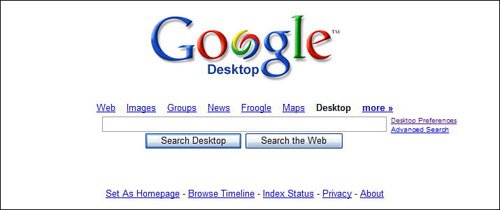
Searching Your Hard DiskGoogle Desktop is really two applications under a single guise. The sidebar, which we'll discuss later in this chapter, is really quite separate from the desktop search engine. In fact, you can't quickly do a desktop search from the sidebar; to search the contents of your PC, you have to launch the Google Desktop program separately. Conducting a Basic SearchWhen you click the Google Desktop icon on your desktop (or select Start, All Programs, Google Desktop, Google Desktop), a new web browser is opened. As you can see in Figure 32.2, the browser is loaded with a page that looks almost identical to the main Google web page. The main differences are that you're not connected to the Internet, the search function is set to Desktop, and there are a few new options at the bottom of the page. (We'll get to them in a minute.) Figure 32.2. The Google Desktop search page.
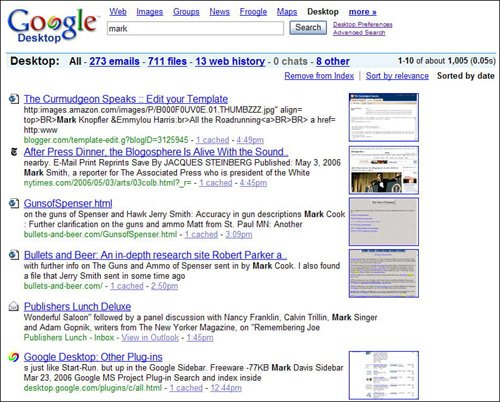
Searching your hard disk is as easy as entering a query into the search box, and then clicking the Search Desktop button. (If you click the Search the Web button instead, Google Desktop connects to the main Google website and initiates a traditional web search.) Viewing Your ResultsThe results of your search are now displayed, as shown in Figure 32.3. This search results page looks a bit different from a standard web search results page, for two reasons. Figure 32.3. The results of a Google Desktop search.
First, the results are, by default, sorted by date instead of relevance, with the most recent results listed first. (You can switch to a relevance list by clicking the Sort by Relevance link at the top of the page.) Second, the results page contains several different types of results. Google Desktop searches forand findsthe following types of items:
Tip Some types of items (such as JPG files, MP3 files, and recently visited web pages) also have a thumbnail of that item displayed to the right of the item listing. Click the thumbnail to view the item (or, if it's a web page, a cached version of the page). The type of item found is easily discerned by the icon next to each search result. For example, email messages are displayed with an envelope icon; files are displayed with the appropriate filetype icon; web pages are displayed with an icon representing the web page's logo or a generic web page icon. For each item listing, Google Desktop displays the item or filename, a brief description of or excerpt from the item, and the location of the file on your hard disk. You can open the file by clicking the filename, or open the folder that holds the file by clicking the Open Folder link. Click the Cached link to view a cached version of the folder comments; click the Date link to view all items created on the same date. (This last option is good for finding related email messages.) Filtering Your ResultsBy default, Google Desktop displays all items in the same list. You can filter the list, however, to display only a single type of item, by clicking the Emails, Files, Web History, Chats, or Other links at the top of the page. (Figure 32.4 shows a search filtered to display only files; note the filetype icons to the left, and the thumbnails for photo and music files to the right.) Figure 32.4. Desktop search results filtered to display only computer files.
Depending on the type of item displayed, you may have additional filtering options. For example, if you display just emails, you can filter the results to include only those messages to or from specific users, as shown in Figure 32.5. If you display just files, you can filter the results to include only specific file types, as shown in Figure 32.6. If you display "other" items, you can filter the results to include only contacts, calendar appointments, tasks, and the like, as shown in Figure 32.7. Figure 32.5. Filtering email results.
Figure 32.6. Filtering file results.
Figure 32.7. Filtering "other" results.
Conducting an Advanced Desktop SearchOf course, it's often easier to refine your query than it is to filter your results. To that end, Google Desktop offers a Search Options page, accessible from the Advanced Search link on the main page. As you can see in Figure 32.8, this page offers various filters you can apply to your queryalthough the filters available vary by type of item you're searching for. Table 32.1 details the available options. Figure 32.8. Fine-tuning your search from the Search Options page.
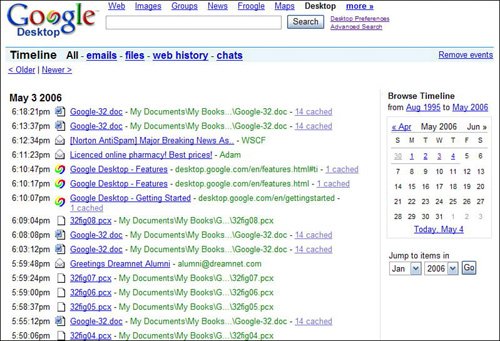
Viewing Items in Timeline ViewSearching by keyword is the way most people will find things on their hard drives, but sometimes it's not the best way to approach the problem. There are times when you remember when you sent or received a message or created a file, not necessarily what the message or file was about. For these times, Google Desktop offers the Timeline view. This view lets you view everything created or modified on a particular day. You access Timeline view by clicking the Browse Timeline link on the main Google Desktop page. As you can see in Figure 32.9, Timeline view lists all your desktop items by date, in reverse chronological order (newest first), starting with today. You can view items from another date by clicking that date on the calendar on the right side of the page; you can also filter items to display only emails, files, web history, or chats. Figure 32.9. Viewing items by date in the Timeline view.
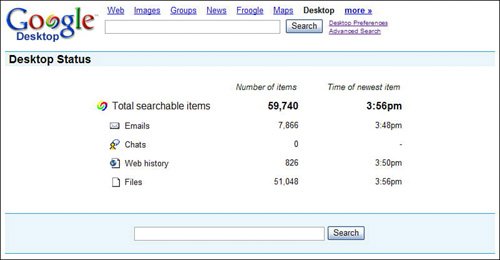
Viewing the Contents of Your IndexWant to see exactly what (and how much) Google Desktop has indexed? Then click the Index Status link on the main Google Desktop page. This displays the Desktop Status page, shown in Figure 32.10, which lists how many emails, chats, web pages, files, and total items Google Desktop has indexed, as well as the time of the most recent item in each category. Figure 32.10. Viewing how many items Google Desktop has indexed, on the Desktop Status page.
|